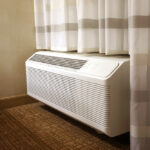
As with any piece of HVAC technology, Packaged Terminal Air Conditioners (PTACs) will likely encounter maintenance issues. There are a number of troubleshooting steps you can take to be sure your Amana PTAC unit is back up and running properly. While many issues with PTACs can be fixed by simply cleaning the air filters or the coils, other issues may be more complex and require a service technician.
Luckily, Amana PTACs are equipped with a diagnostic function that helps to identify possible maintenance issues with a system of codes. If you’re an HVAC technician, you are probably familiar with some of these codes already. However, the solutions available for these issues may surprise you.
In this guide, we’ll walk you through the list of diagnostic codes that your Amana PTAC may display and provide some possible solutions. We’ll also cover a few troubleshooting steps and tips you can use to make sure your unit runs properly.
Diagnostic Mode
In order for your PTAC to display an error code, you will first need to put the machine in diagnostic mode. This allows the unit to check for errors and produce a code that describes its current operating state.
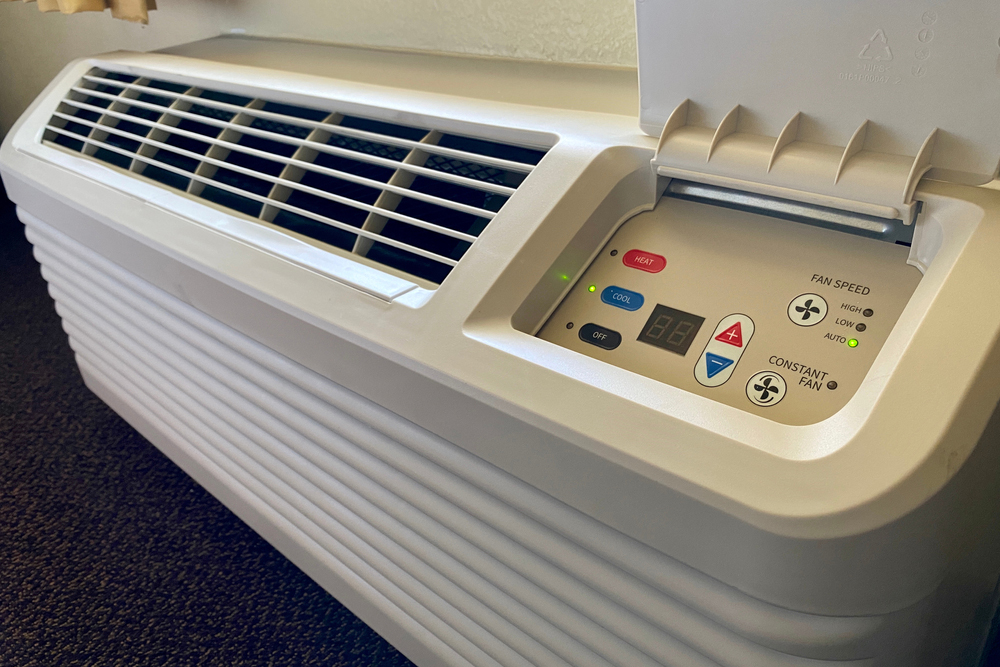
To put the machine in diagnostic mode, there aretwo2 steps:
- Press and hold the UP (+) and DOWN (-) arrow buttons.
- While holding the arrows, press the “COOL” button twice.
If done successfully, the display will change and the machine will now be in diagnostic mode. A red dot will flash in the corner of the display.
Where there are normally numbers to indicate temperature, there will either be a set of dashes ( – – ) or a diagnostic code. There may also be a green light (also known as the status light) in the lower-left corner of the touchpad below the “OFF” button.
A set of dashes on the display ( – – ) indicates that no erroractive failure, mode, or lockout can be detected at that time for the unit. No error code will present. While you may still have a maintenance issue, the unit may not have a diagnostic code to report it.
If the unit does detect an error, active failure, mode, or lockout, the display will show one of the following codes.
Error Codes and Solutions
There are four categories of codes that your system might display for a maintenance issue. System modes, failures, airflow alerts, and refrigeration alerts are common problems that can be detected by your Amana PTAC’s diagnostic function.
System Modes
Certain operating states or system modes are designed into your unit for safety, security, or compatibility functions. Each of these will display a specific code. While these modes are not necessarily maintenance issues, they can be the cause of your unit not functioning as expected. System modes can often be fixed by changing the settings directly or improving the unit’s surroundings.
FP – Freeze Protection
The code “FP” indicates the system is in Freeze Protection mode. Freeze protection mode is activated when the thermostat or thermistor detects temperatures below 40 ℉. This keeps the essential elements from freezing and causing damage. The unit will move out of Freeze protection mode once the thermostat or thermistor read above 43 ℉.
Fd – Front Desk Switch
The code “Fd” means that the front desk switch is closed. In other words, all outputs for the unit are off. To fix this, you would need to ask the front desk to re-open the switch so that the unit can resume regular operation.
Eo – Service Board Not Configured
The code “Eo” indicates that the service board on the unit is not configured properly. To fix this, you will need to change the configuration settings in the menu of the unit. If the setting reads “C3,” change this to “C.” Note that this applies to PTAC units that also have electric heat. For units that operate using heat pumps instead, change the setting to “H” instead.
EH – Emergency Hydronic Mode
The code “EH” means that the system is in Emergency Hydronic mode. This also typically means that the compressor is off and the EHH switch is closed. To move out of this mode, you will need to re-open the emergency hydronic switch.
LS – Load Shedding Mode
The code “LS” means that the unit is in Load Shedding mode. This means that the compressor and the electric heat are both off. The LS switch is aso closed. To move the unit out of this mode, simply re-open the LS switch on the unit.
On – Wired Thermostat Configuration
The code “On” appears in the display when the unit has been configured to work with a wired thermostat (instead of a wireless one). If you are attempting to use the unit with a wireless thermostat, this will cause a configuration error. To fix this, you will need to change the configuration mode to the proper setting in the configuration menu.
oP / nP – Open Door or Window Lockout Mode
The codes “oP” or “nP” may appear if the unit detects that a door or window is open in the room. This may cause the unit to stop working completely for energy conservation. To resume regular operation, simply close the door or window.
HP – Heat Sentinel Mode
The code “HP” indicates that the unit has entered Heat Sentinel mode. Much like freeze protection mode, heat sentinel mode protects the unit from overheating. It may also trigger a cooling function as a proactive measure. The unit should move out of this mode automatically once the temperature of the room or the unit itself returns to safer levels.
Ur – Un-Rented Mode
The code “Ur” indicates that the unit has a status of “Un-Rented.” This may keep the unit from functioning properly. To move the unit out of this mode, you will need to contact the front desk to change the status from “Un-Rented” to “Rented.” Note that this does not apply to all units.
Failures
Failure codes indicate that a piece of the unit has stopped working properly or has “failed.” To fix the problems associated with these codes, you will usually need to replace the defective part or repair it. While these codes do not detect malfunctions in all parts of the unit, they can help you with some common failures.
F1 – Thermistor and Thermostat Failure
The code “F1” typically indicates a double failure. First, the Indoor Ambient Thermistor (black) is reading outside of the predetermined range (-20 ℉ to 200 ℉). Second, it means that the wireless thermostat is no longer sending signals to the unit control. To fix this error, you would need to replace the black thermistor and/or the wireless thermostat.
F2 – Wireless Remote Thermostat Failure
The code “F2” indicates that the Wireless Remote Thermostat has failed. As a solution, you will need to replace it.
F3 – Indoor Ambient Thermistor (Black) Failure
Like “F1,” the code “F3” indicates that the black Indoor Ambient Thermistor on the unit is reading outside of its predetermined range (-20 ℉ to 200 ℉). As a solution, it will need to be replaced.
F4 – Indoor Coil Thermistor (Red) Failure
The code “F4” means that the red Indoor Coil Thermistor is no longer working or has exceeded its operating tolerance. In this case, you will need to replace it.
F5 – Wireless Thermostat Failure
The code “F5” means that the wireless thermostat itself has failed. To fix this, you would either need to rebind the thermostat or replace it entirely.
F6 – Indoor Discharge Thermistor (Yellow) Failure
The code “F6” indicates a failure in the yellow Indoor Discharge Thermistor. This means that it is either above or below its operating tolerance. In this case, it will need to be replaced.
Fb – Low Remote Battery
The code “Fb” indicates that the battery in the PTAC remote is too low. In this case, you will need to replace the battery inside the device.
H1 – High Voltage Protection
The code “H1” typically indicates that the input voltage is too high. As a solution, check the voltage coming into the unit and adjust accordingly. Note that higher voltages are capable of delivering extreme shock, and you should exercise great caution when checking voltage for your unit. You may also need to contact an electrician.
Br – Brown Out Protection
The code “Br” usually means that the unit has lost power or the incoming voltage is too low. Brown out protection keeps the unit from being damaged by any fluctuations in electrical energy. In this case, you will need to check the voltage coming to the unit and adjust to the proper levels. In this case, still exercise caution and call an electrician for safety.
Airflow Alerts
Your unit may also display codes for issues related to various airflow systems and temperatures. These usually require very general maintenance on parts such as coils and filters. For Amana PTACs, there are four airflow-related issues that your unit can detect.
L6 – Discharge Air Heat Warning
The code “L6” indicates that the air flowing out of the unit (known as discharge or “head”) is too hot for normal operation. Typically this can be fixed by cleaning the air filter.
LC- Outdoor Coil Thermistor (Red) Heat Warning
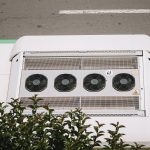
The code “LC” will display when the red Outdoor Coil Thermistor is reaching temperatures that are too hot for normal operation. To fix this, you may try cleaning the condenser coils and the air filter. You will also want to make sure the condenser fan is working properly.
C2 – Indoor Air Recirculation
The code “C2” means that the air inside the room is being recirculated through the unit. This creates a problem with both conditioning and freshness. To fix this, check the seal around your unit and be sure it creates a solid barrier between inside and outside air. This ensures that airflow is conditioned entirely through the unit. You may also need to close the vent door and clean the filter.
C5 – Outdoor Coil Heat Warning
The code “C5” indicates that the temperature of the outdoor coils is too high for outdoor ambient readings. As a solution, you will likely need to clean the coils and remove anything that might block outdoor air from flowing into the unit.
Refrigeration Errors
Your unit may also diagnose issues related to the refrigeration system and cooling temperatures. While the solutions for these errors may be simple, they may also require a technician to repair certain defective parts.
C1, C3, and C4 – Indoor Coil Freeze Warning
If your machine shows codes “C1,” “C3,” or “C4,” this indicates that the indoor coil is either starting to freeze or already frozen. To fix this, you will want to start by cleaning the filter and checking for defects in the fans or blowers. Then, check for low refrigerant levels and fix any possible leaks. After this, make sure the capillary tube is not restricted in any way.
C6 – Poor Unit Performance
The code “C6” can mean that multiple parts of the unit are malfunctioning or at least not running as effectively as they should. Check the operation of the blower motor, the compressor, and all electric heat components. Replace or clean any parts as necessary.
C7 – Indoor Freezing Lockout
The code “C7” indicates the same freezing issue from codes “C1,” “C3,” and “C4.” However this code will also lock the temperature settings and any other normal operation of the controls for up to ten minutes. To fix this, follow the same troubleshooting steps for the Indoor Coil Freeze Warning.
Other Maintenance Tips
While your Amana PTAC unit is able to diagnose many of the possible malfunctions, there are some that will not be indicated by a code. If the unit stops producing heat, is not cooling the space enough, or has issues with incoming or outgoing pressures, there are a few ways you can diagnose and resolve these problems yourself. Some may require a more experienced technician. However, many malfunctions can be fixed by cleaning filters and coils.
Unit Not Turning On
Before you encounter any more specific problems with the function of the unit, let’s imagine that the unit is not powering on at all. Aside from making sure the unit is plugged in, you will want to check any power cords for shorts and ensure that connection is not interrupted by breakage or bad wiring. You can also test the voltage of the power cord in order to be sure it is enough to support the unit. You will also want to check for any blown fuses.
No Heat
In some cases, the unit may run normally with no heat at all, or with heat not blowing often enough. This can be the result of a bad thermostat that does not come on at the right time. You should still check the voltage for this error to detect any possible blown fuses or bad power cords. These can, in turn, affect the operation of the compressor.
You may have an open internal overload switch. This will stop the flow of electricity to the compressor and prevent it from running. An overload switch acts as a safeguard for when the compressor gets too hot. When overheating, the overload switch will then “open” to stop the compressor until it cools down. If the compressor is overloaded, your unit’s heating function will stop working.
In some cases, the compressor could also be stuck. Because of this, you will want to check the condenser fan and the compressor for mechanical issues and repair any shorts in the fan motors.
Cooling Issues
If your unit isn’t blowing enough cold air (or if no cold air is blowing at all), the issue is often related to the thermostat or the refrigerant levels.
First, check the thermostat for proper operation and repair any shorted wires. You may also need to replace it entirely.
With cooling issues, you may also hear a loud noise coming from the unit. This typically indicates an issue with the compressor, and you will need to repair/replace any broken parts within that system.
Cooling issues may also be a direct result of low refrigerant levels. Be sure to remove any blockages and/or kinks in the coolant lines. Of course, you should also clean your coils and filters (which may resolve the issue).
System Operating Pressures
Lack of adequate pressure flowing in or out of the unit will also cause issues with operation. On the other hand, you may also have too much pressure on either side.
If the suction (inward) or discharge (outward) pressures are too low, this may be a result of insufficient refrigerant. Similarly, the coolant lines might be blocked, kinked, or otherwise need replacing.
High suction or discharge pressure may be due to bad wiring with a fan motor, too much refrigerant, or a bad compressor. Sometimes this can also be due to an issue with airflow blowing across the coils.
With any pressure issue, be sure to check the compressor, any blower fans, and clean your filters and coils.
Final Thoughts
If your Amana PTAC is not working properly, you can diagnose the problem with a combination of error codes and other troubleshooting tips. While there are some simple steps you can take, you might need to call an HVAC technician for help.
If you have a maintenance issue with your model, PTAC Units can help with replacement parts and repair services. If that’s too much trouble, you can also get a new or refurbished unit with a great warranty.